- You can create a client profile yourself.
- To get started, select ‘Clients’ in the left sidebar menu or click the link Clients.
- To add a new client, click ‘Add Client’ button in the top left corner or click the link Add Client.
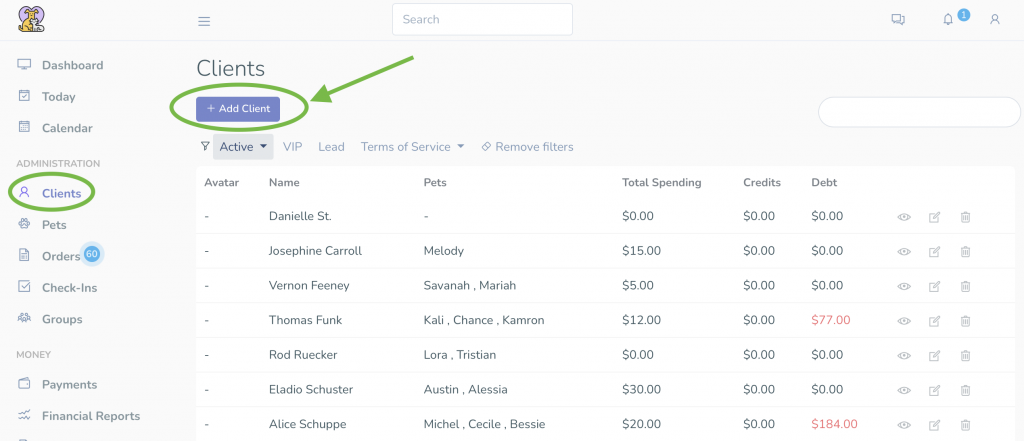
Note: you may send an email notification to your client that their Doxford account has been created (Send Welcome E-Mail button).
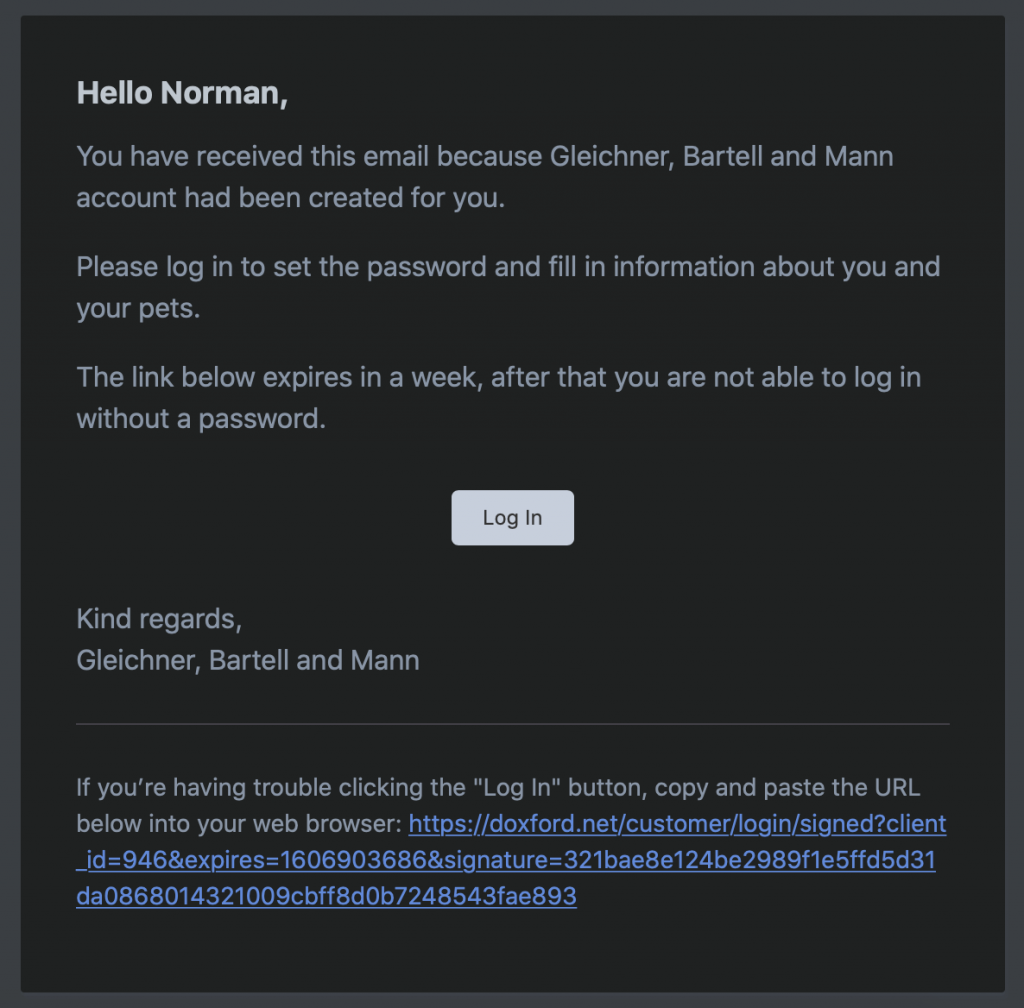
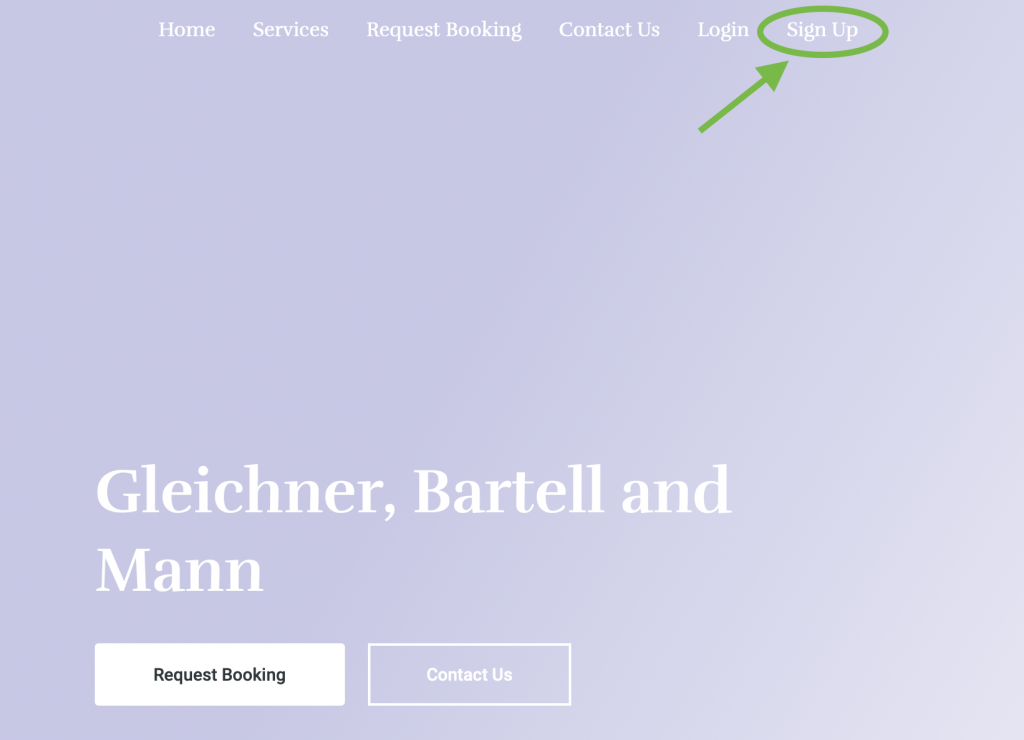
- Clients can also register on their own.
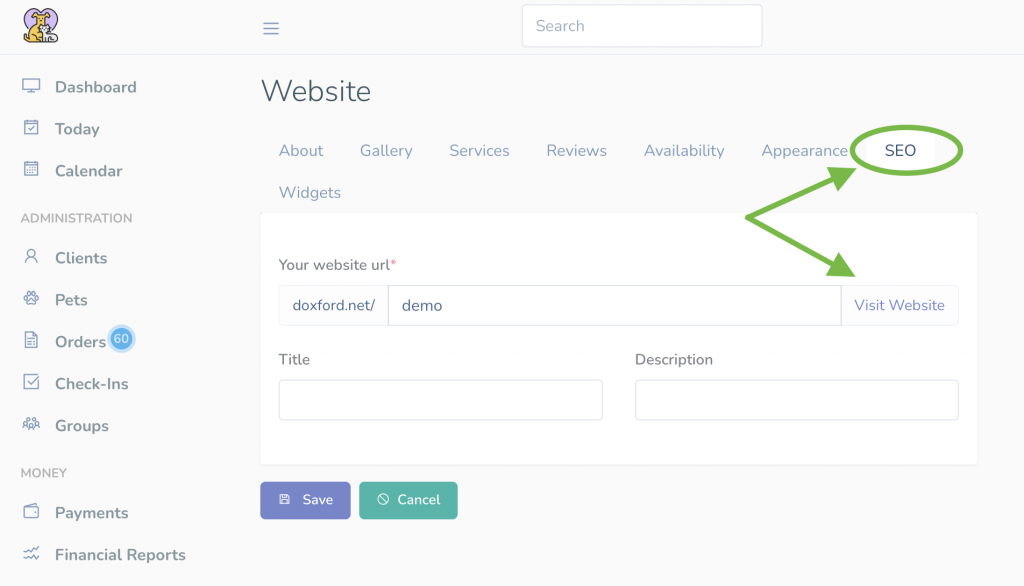
- To do that, they need to click the ‘Sign Up’ button on your Doxford webpage.
- To get to your webpage, select ‘Settings’ – ‘Website’ in the left sidebar menu, then click the ‘SEO’ tab.
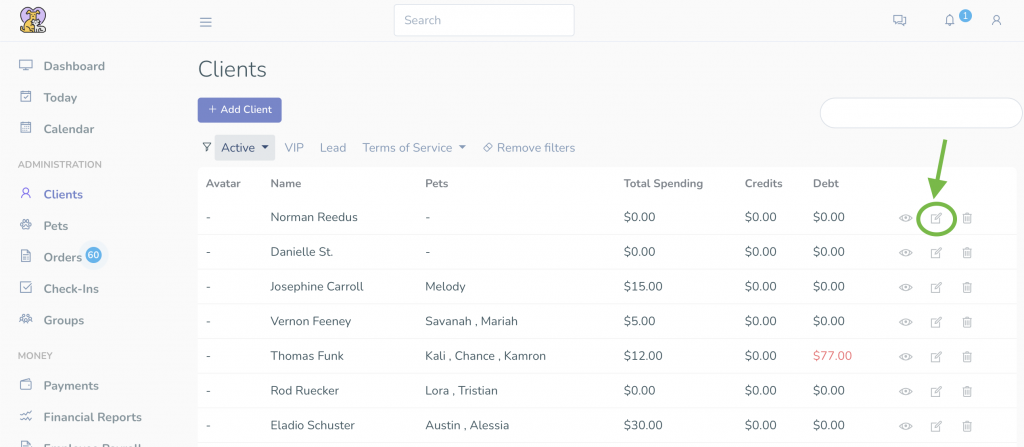
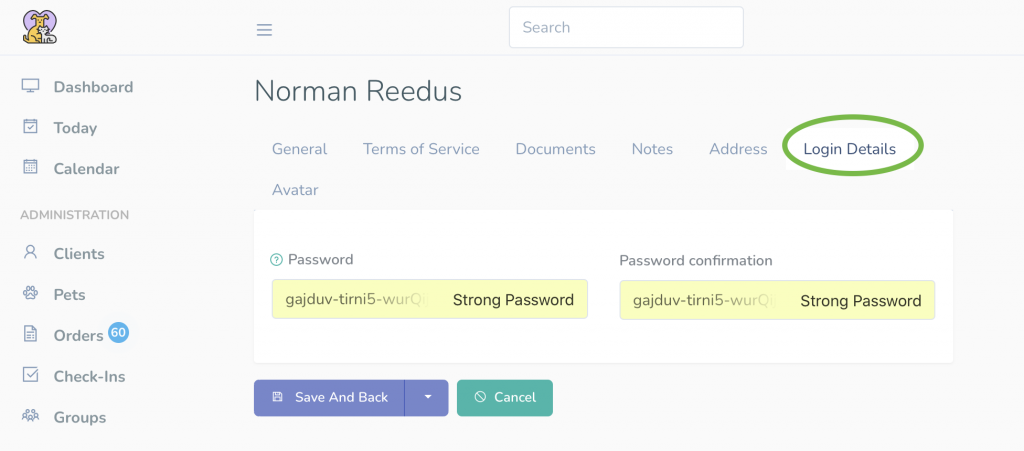
- You (as well as your clients) can always change their password (in case they forgot it, for example) in the client’s profile.
- To do that, click on the ‘Edit’ icon on the right side of a client.
- Once you get to the profile, select the ‘Login Details’ tab and change the password.
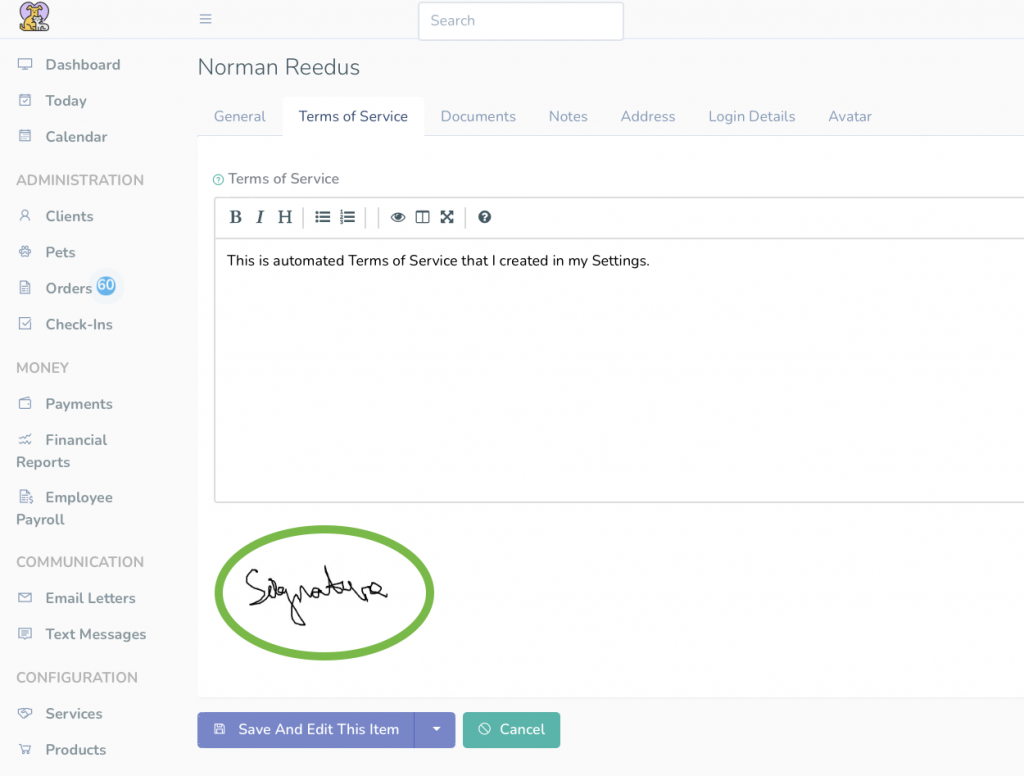
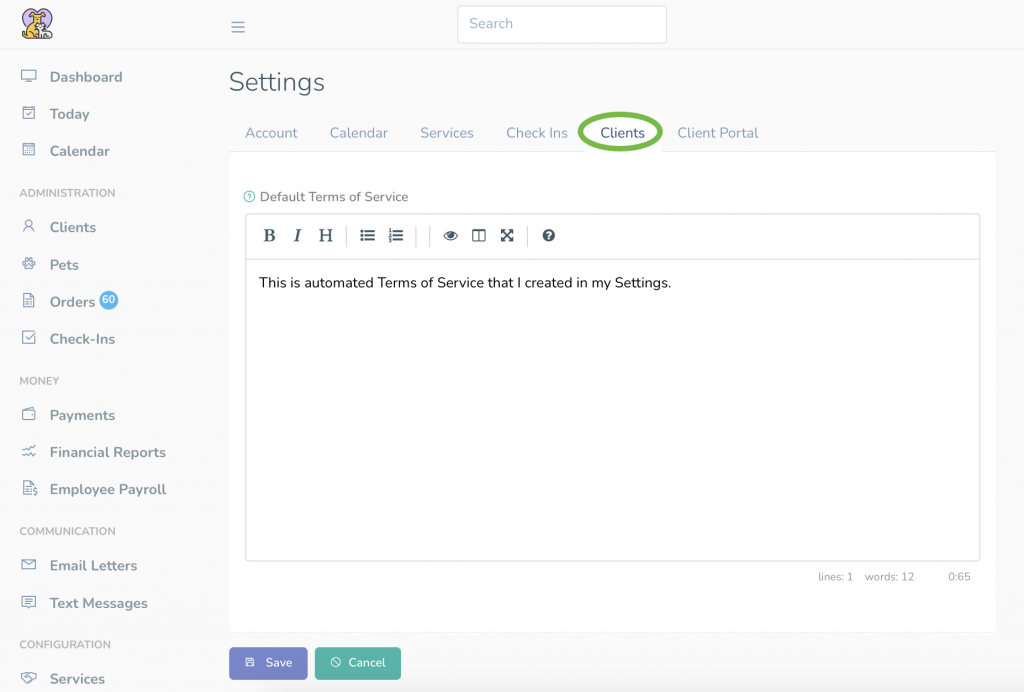
- You can add your personalised Terms of Service for clients to e-sign.
- To do that, first go to ‘Settings’ – ‘General’ in the left sidebar menu and select the ‘Clients’ tab. You can add default Terms of Service in the field there which will apply to your clients automatically.
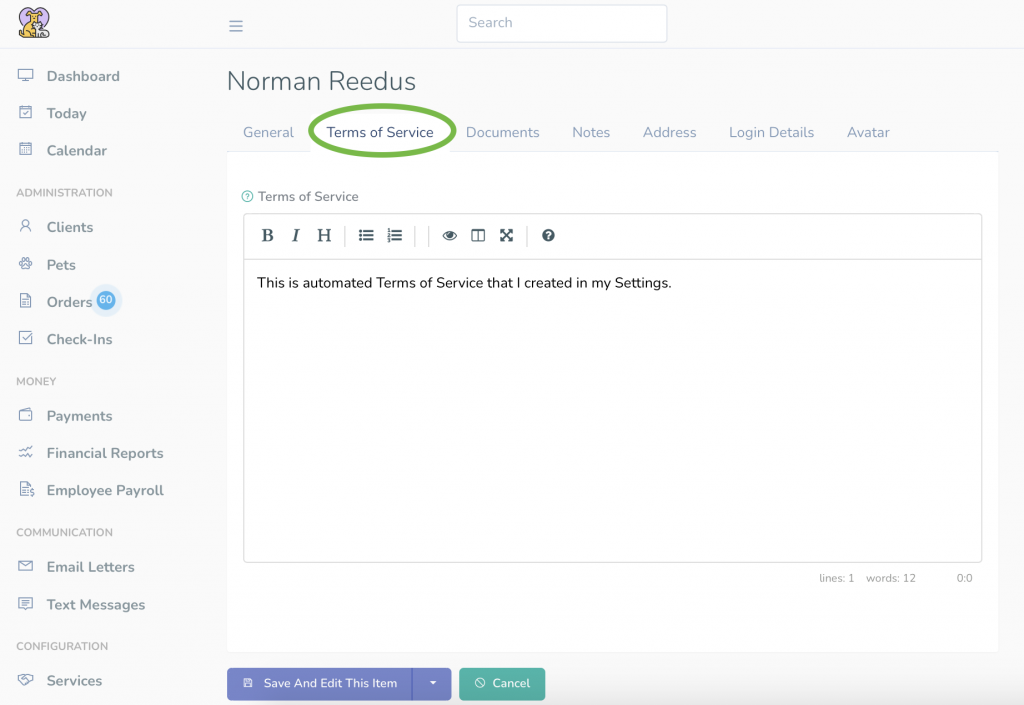
- Once you create a new customer, Terms of Service will automatically apply. To attach them to your ‘old’ clients, click on the ‘Edit’ icon on the right side of a client (in the Clients list). Terms of Service will already be there, you just need to save them.
- Once a client sign Terms of Service, the signature will appear in your account, too.